UE4:オンラインラーニング(ブループリントを C++ に変換する)
UE4オンラインラーニング
ブループリントを C++ に変換する
を受講した際のおぼえ書きになります。
https://learn.unrealengine.com/course/3548019
継承ルール
C++からBPののみ継承ができる。
逆はできない。
エディタからC++クラスの作り方
4.26では動画とは製作の手法がちがっており
4.26現在では
メニューバー>ファイル>新規C++クラス
から作成します。

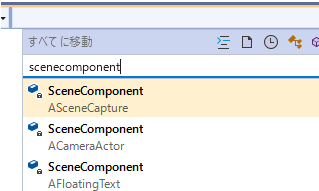
SceneComponentはActorComponentと違い
トランスフォーム情報を持つかどうかが違いです。
クラスの定義方法
BPに継承可能のなクラスを作成したい場合は
Blueprintableを指定しておくことで継承可能になります。
UCLASS( ClassGroup=(Custom), meta=(BlueprintSpawnableComponent), Blueprintable )
class BLUEPRINTSTOCPP_API UGrabber : public USceneComponent
{
	GENERATED_BODY()
Tickの有効化
アクター、コンポーネントそれぞれのTickの有効化指定方法
PrimaryComponentTick.bCanEverTick = true;
PrimaryActorTick.bCanEverTick = true;
コードの検索方法
Ctrl+,(カンマ)で検索できる
BlueprintImplementableEvent BlueprintNativeEvent
で用途に合わせて使い分ける必要があります。
BlueprintImplementableEvent
・C++で宣言し
・BPですべて定義し
・BPでイベントを作成する形になる
UFUNCTION(BlueprintCallable, BlueprintImplementableEvent)
void NotifyQuestActor(AActor* Actor);

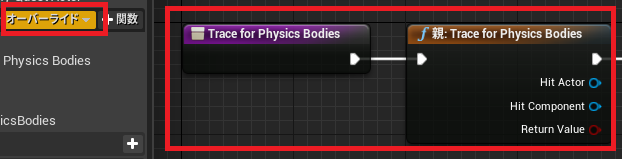
BlueprintNativeEvent
・C++で宣言し
・C++でデフォルトで定義しBPで必ずしも再定義する必要はない
・BPでオーバーライドする形になる
UFUNCTION(BlueprintCallable, BlueprintNativeEvent)
bool TraceForPhysicsBodies(AActor*& HitActor, UPrimitiveComponent*& HitComponent);
構造体のメンバの指定方法
詳細メニューのピンオプションのチェックボックスを入れることで
特定の構造体の中身をしていすることができます。
何気に知らなかった機能です。

構造体の分解
構造体を分解したあとピンを少なくすることができます。
何気に知らなかった機能です。

コンポーネントの追加方法
AQuestMarker::AQuestMarker()
{
 	// Set this actor to call Tick() every frame.  You can turn this off to improve performance if you don't need it.
	PrimaryActorTick.bCanEverTick = false;

	Root = CreateDefaultSubobject<USceneComponent>(TEXT("SceneRoot"));
	ParticleSystem = CreateDefaultSubobject<UParticleSystemComponent>(TEXT("ParticleSystem"));

	SetRootComponent(Root);
	ParticleSystem->SetupAttachment(Root);
}
デリゲータ
超重要
// ☆デリゲータの定義
DECLARE_DYNAMIC_MULTICAST_DELEGATE_OneParam(FCompletedQuestSignature, int32, QuestIndex);

UCLASS()
class BLUEPRINTSTOCPP_API AQuestManager : public AActor
{
	GENERATED_BODY()

public:
	//  ☆デリゲータ
	UPROPERTY(BlueprintAssignable, BlueprintCallable)
	FCompletedQuestSignature CompletedQuest;

	// ☆メンバ関数
	UFUNCTION()
	void QuestUpdate(int32 Index){}
};
cpp 初期化時
// ☆デリゲータにメンバ関数の追加
CompletedQuest.AddDynamic(this, &AQuestMarker::QuestUpdate);
cpp 呼び出し元
// ☆デリゲータの呼び出し
CompletedQuest.Broadcast(QuestIndex);
入力のバインド
パッド入力の部分をC++で実装することができます。
UCLASS()
class BLUEPRINTSTOCPP_API AFirstPersonCharacter : public ACharacter
{
	GENERATED_BODY()

	// ☆メンバ関数
	void Forward(float AxisValue){}
	void Grab(){}
};
// ☆メンバ関数のバインド
void AFirstPersonCharacter::SetupPlayerInputComponent(UInputComponent* PlayerInputComponent)
{
	Super::SetupPlayerInputComponent(PlayerInputComponent);
	PlayerInputComponent->BindAxis(TEXT("Forward"), this, &AFirstPersonCharacter::Forward);
	PlayerInputComponent->BindAction(TEXT("Grab"), EInputEvent::IE_Pressed, this, &AFirstPersonCharacter::Grab);
}
できたもの)
youtu.be
非常に勉強になるコースだった。
このコースではBPでかられたものをC++への変換方法を学ぶことができるが、
変換作業を通じ、BlueprintImplementableEvent、BlueprintNativeEvent、デリゲータ、入力のバインド
といった方法を学ぶことができる。
UE4のコードから学んだことはあるが、
こういった教材を使って順序良く学ぶことになると
新しく発見があることがわかる。
なお受講が終わったらサンプルは削除した方がよい容量を圧迫するため
サンプル重いっす。